Two years ago the kids were off school for President’s Week. We took vacation and drove from Sonoma to San Diego in eight days, and visited all 21 Spanish Missions founded in California. My son was in fourth grade and all 4th graders in California study the missions. So this trip evolved and it turned out to be a really cool experience.
The missions locations were chosen so that each were a day’s journey by horseback. That translated to about an hour drive between each location.
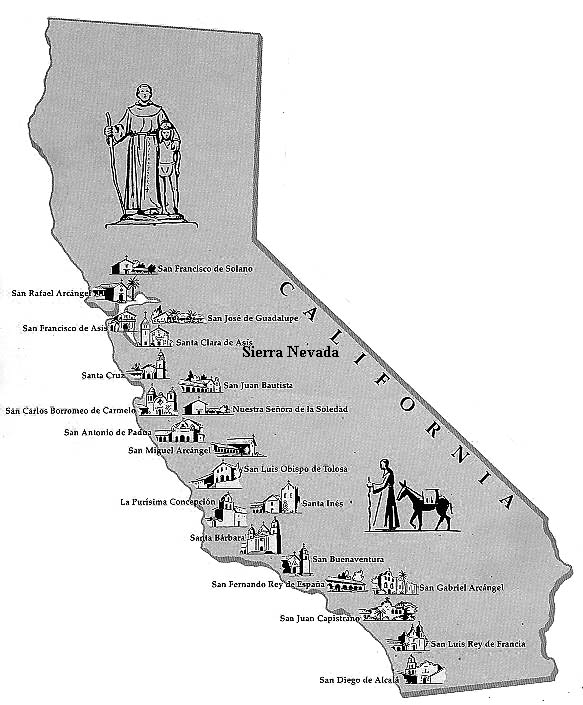
When we made up the itinerary we decided to spend the first two nights at home while we were still within the Bay Area. Because most of the missions have standard 10AM – 4PM visiting hours, we would visit three per day: the first when the mission opened, drive to the second mission, eat lunch, and then visit it. Then we would drive to the third mission hopefully within an hour before they closed in the afternoon. Then we would drive to the city where the first mission to see the next day and get a hotel room. That way we could pack up in the morning and already be close to our first stop.
Here’s how the trip actually played out:
Day 1: San Rafael, California Missions Museum, San Francisco Solano.
Day 2: San Francisco Dolores, Santa Clara (+museum), San Jose.
Day 3: (Got a late start…) Santa Cruz (was closed), San Carlos Borromeo.
Day 4: San Juan Bautista, Soledad, San Antonio de Padua, San Miguel.
Day 5: San Luis Obispo, La Purisima, Santa Ines.
Day 6: Santa Barbara, San Buenaventura, San Fernando Rey.
Day 7: San Gabriel, San Juan Capistrano, San Luis Rey.
Day 8: San Diego de Alcala, drive home.
Here’s the pictures we took of my son in front of all 21 missions. It was probably the best trip we’ve ever taken as a family, and we all still talk about it today.
This slideshow requires JavaScript.
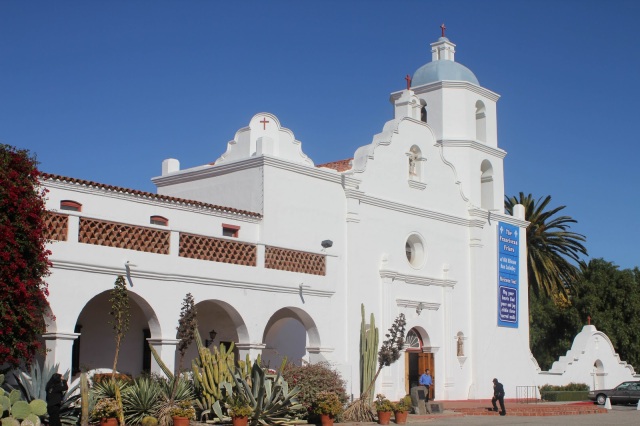
As part of my son’s missions study, he needed to make a model. Always the ambitious one, he said “I want to make San Luis Rey, because it is the largest mission.” He told me it is the “King of Missions”.
I downloaded the architectural plans for the mission he selected from the Library of Congress website, and we started building it out of foam core board.
This was clearly going to be a huge undertaking, and since we went on our trip during the week they had off of school, we only had 6 days to complete it. It did help to actually go there, so we could get a feel for the place and decide what details we wanted to include in the model.
We experimented with some 3D printing of the domes and cupola, and the results were pretty good considering.
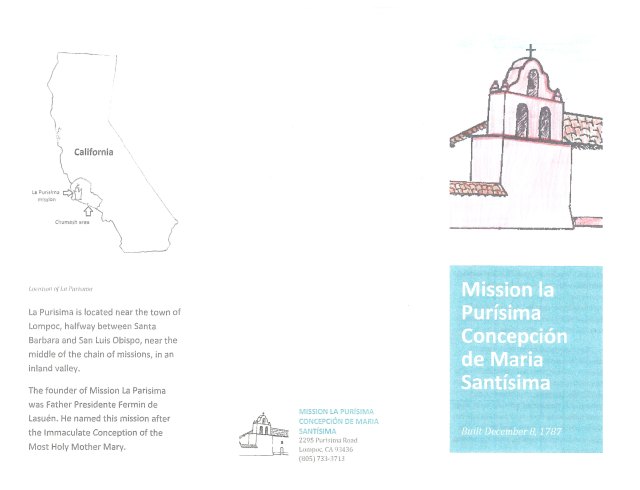
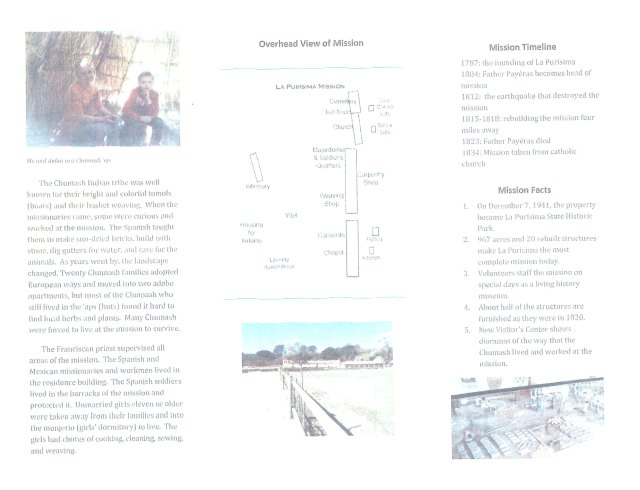
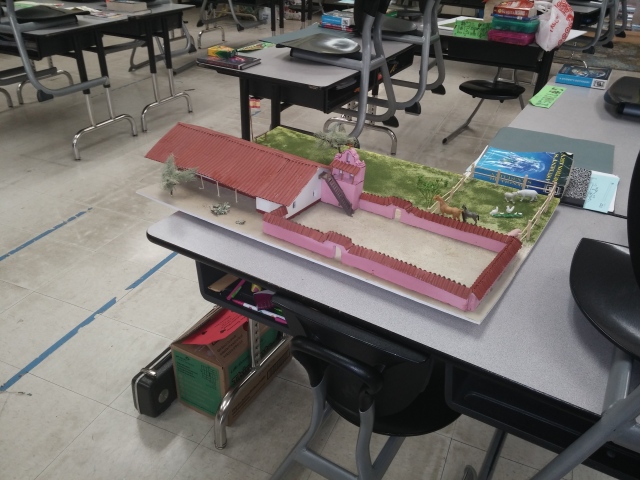
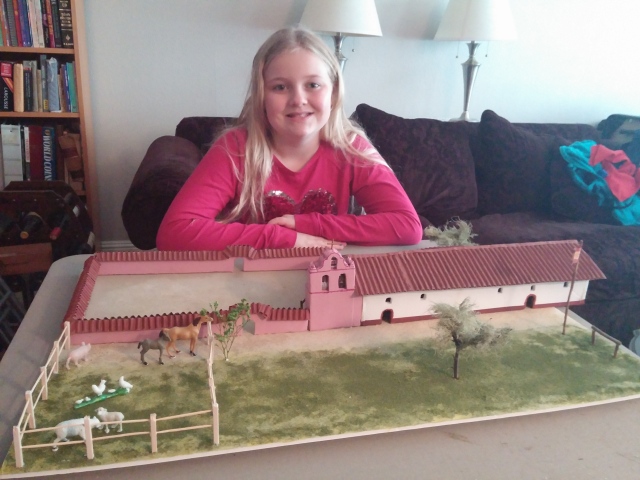
Now, two years later, my daughter is in fourth grade, and unfortunately because the mission project was due before President’s week, we had to turn it in without getting a chance to visit the mission she chose to model. Because she had been to all the missions, she could choose her favorite based on personal experience. We had saved brochures from every mission we visited, and after perusing and reminiscing, she settled on La Purisima in Lompoc. My mom grew up in Lompoc and I think that mission made an impression on my daughter because they had authentic livestock, living history, and a pink bell tower.
Here’s some photos from our visit two years ago.
This slideshow requires JavaScript.
Part of her assignment was creating a brochure for her mission and include specific items on each section of the trifold. A MS Word template made it super easy.
In this case, she did much of the project, at least that which did not involve the use of the Xacto knife. We went shopping for paint, foam core, and a few supplies at Michael’s craft/hobby store, but otherwise I am proud of the fact that we largely used found materials. On my daily commute, I pass through a regional park that is heavily wooded. Stopping at a turnout, I collected Redwood twigs, oak brambles, some lichen, and spanish moss.
She first worked on making roofing material from Girl Scout Cookie boxes (’tis the season!). We chose the scale of 1/8″ = 1′ (1:96). I happen to own an architect’s scale, so we used the dimensions in the illustration to create paper templates. Lots of math and measuring. She was bored.
After cutting the pieces and gluing them together, the church sat on its roof overnight to dry. We shortened the building a bit to make it easier to display.
The basic building is complete. The assembled bell tower looks pretty good. We let the tower’s awning and cross dry.
Here’s step by step of making the cemetery walls. We measured the wall topper based on the template, then marking and cutting.
The “tiles” are sliced down the middle to make a peaked roof. Then the scored cardboard is folded and ready to glue onto the wall. The walls are double-wide, so we’re gluing the black side of identical pieces together. A triangular piece of foam is glued on top and banded to dry. We checked the length of the back wall against the church width. The roof is glued on and banded to set.
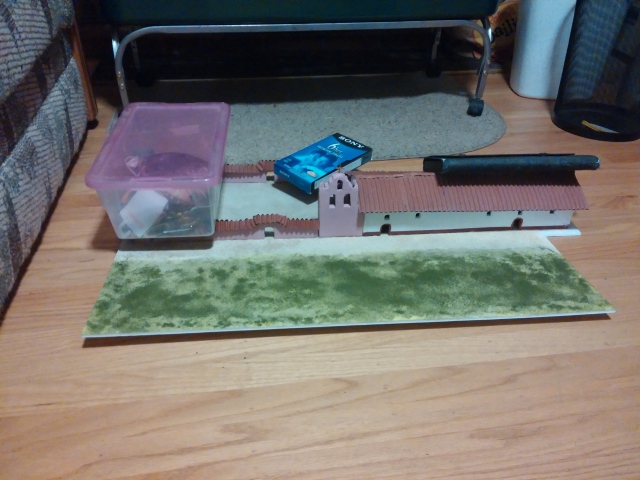
The walls are coming together! This was our progress so far when we went to bed Wednesday night. Due Friday!
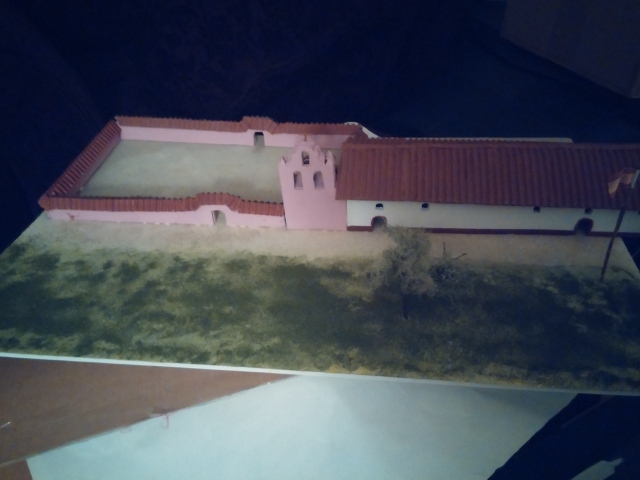
We prepared the model base by sponging on green and tan poster paints. Spray glue was applied and then both sand and crushed green foam “grass” sprinkled in the appropriate areas. The structure, tower, and walls were then attached with wood glue. Trying to get the structures to stick down, we set weights on the structures. This helped collapse the roof a bit, which was soft from being recently painted. Overnight the board warped as the paint dried, so in morning I had to mist with a spray bottle and weight down the corners. It mostly flattened out within an hour.
 I printed out a picture of the bell tower and we cut out the pictures of the bells in the arched openings, and I carefully inserted them into the model’s openings. I freehand cut a staircase from black construction paper. It’s late, after midnight. I continue tinkering with the staircase after she goes to bed. The tower looks like it has a Pepto Bismol wash.
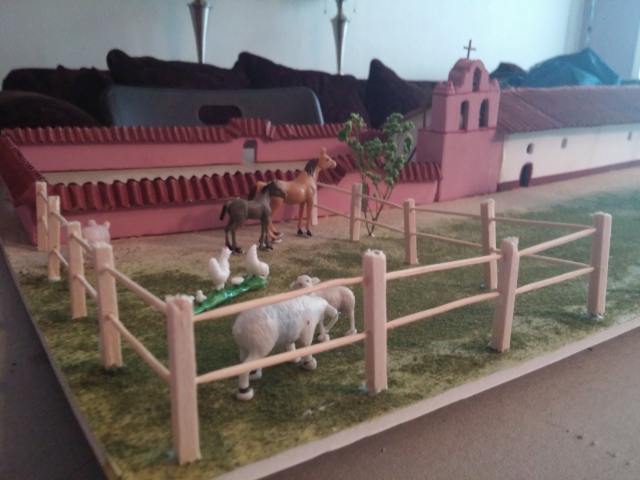
 The next morning, the morning it’s due, we wake up at 6:30 and finish everything. To make the corral, we cut small lengths of 1/8″ square basswood for fence posts, and stuck them with rails made of toothpicks. The barnyard animals were tacked down with museum putty (a much better method than the hot glue we used two years ago), and a small green sprig from a dried floral arrangement made a small tree near the corral. Maybe animals back in 1820 had gigantism left over from the Ice Age?
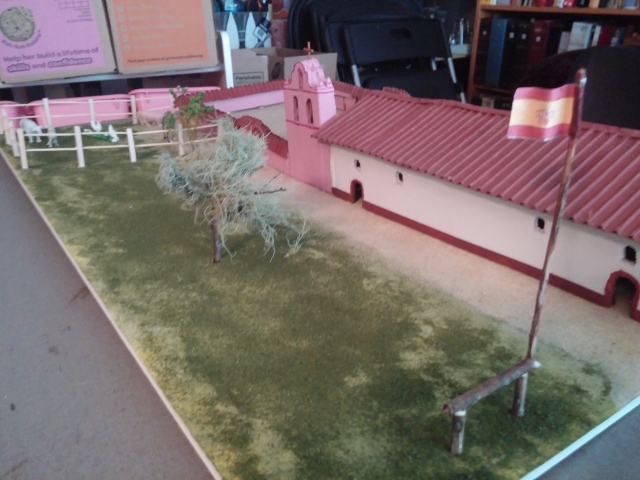
 A redwood twig, once stripped of bark, was decorated with an 1820 Spanish flag (same as was flying at the actual mission). The flag was made by printing out two copies of the flag, gluing a piece of aluminum foil into the middle, and sandwiching it around the flagstaff. The foil allowed her to make standing waves before the white glue dried it into that form permanently.
 Shot showing the paper bells and tower pin-striping.
 The Peruvian Pepper Trees (nearly all 21 missions feature these trees, which for over 150 years have produced annual crops of black peppercorns) were made from oak twigs and spanish moss. Lichen was used for a bush in the back, A last minute decision was made to put toothpick supports under the sagging roof overhang. We didn’t model the stinky tallow vats.
Then it was off to school we went. It barely fit in my passenger seat, but we had a successful transport to her classroom. What a relief!
Strike a pose
Strike a pose
All you need is your own imagination
So use it that’s what it’s for (that’s what it’s for)
Go inside, for your finest inspiration
Your dreams will open the door (open up the door)
UPDATE: If you’re interested in the 3D CAD files used to make these missions, try the following links:
San Luis Rey Espadaña
San Luis Rey Mission Domes and Cupola
El Camino Real Bell
La Purisima Mission
Here’s a 3D rendering of La Purisima I made in preparation for this project:
https://tinkercad.com/embed/1xUUbxCjHd5?editbtn=1


 For those of you who were educated in public school, the USS Arizona was attacked and sunk at battleship row in Pearl Harbor on December 7, 1941 at a great loss of lives. 1,177 servicemen of her crew of 1,400 were killed. The attack on Pearl Harbor led to the United States actively joining the Allies in the Second World War.


 It was a fun project and I enjoyed getting to know better both this ship and the sacrifice of her men.


